Considering that snowboard season is nearly upon us, I thought that it just might be a damn good idea to build an obstacle this month that does great double-duty as both a skateboard obstacle, and as a snowboard jib. It's also an extremely simple build that can be done in as little as a couple hours, and for well under fifty bucks. It's a portable railslide bar design that I came up with in the early 1990's for the weekly "skateboard jams" that I used to host in my old company's hometown of Concord, New Hampshire. And in the wintertime, I'd drive my four-wheel-drive truck into the woods just outside of town, and kick these off my tailgate for my wintertime "jib park" that I would later set up amongst the trees.
Those were all great times, and they were all spent on an obstacle that any kid (and their dad) can build in almost no time at all, even with extremely limited resources at their disposal.
I'm also starting to get a lot more comfortable with the tedious process of scanning, re-working, and coloring these plans. These were all originally hand-drawn and compiled in 2001 for a book project that I was working on (but never finished). I hope you'll agree that they're coming along rather well. And as always, I'm right here to answer any and all building-related questions. Just hit me up at budstratford@aol.com. Here we go with the plans for this month:
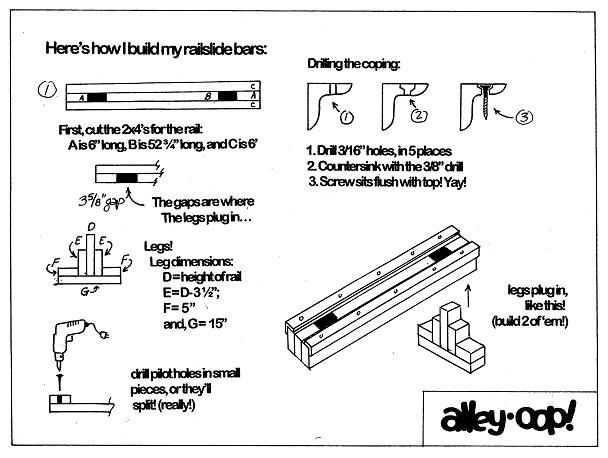
The original plans for the railslide bar, circa 1995 (or so). Printed in the first (and only) issue of my short-lived and hardly-read 'zine, "Alley-Oop!". My, how the times have changed. Thank God for the internet...!
The matrials list for this project is incredibly simple:
- Four to six 8' long 2 x 4's... depending on how tall you want your legs, and how many you want to build.
- A small, 1lb. box of 2 5/8", coarse-thread drywall screws. I strictly use coarse-thread screws, so they don't pull out over time.
- Some "Oops" paint, and a paint brush.
And, most importantly:
- Two pieces of hot rolled steel (HRS), angle-iron coping, cut to whatever length you want. It's extremely important to get the right size and web thickness! Specify 1 1/2" x 1 1/2" x 1/4" angle iron. You'll need that 1/4" thickness for countersinking the screws, which is hugely important if you don't want your skateboard (or snowboard) getting gouged to shit.
Get this at a full-service steel distributor, and let them cut it to length for you. This stuff is really thick, and sort of a bitch to cut through with anything but a mega-sized band saw. Trust me on this. I used to work in a machine shop. I know what I'm talking about. Get lazy, spend the pennies, and let the pros do it.
And as a bonus, you might want to consider a small bottle of wood glue, if you want to go all-out and build the most bulletproof railslide bar imaginable. I used this trick to good affect, and quite often. Especially on the small pieces of the legs. They're prone to getting whacked by flying skateboards all the time, so some extra adhesive on those is really a good idea.
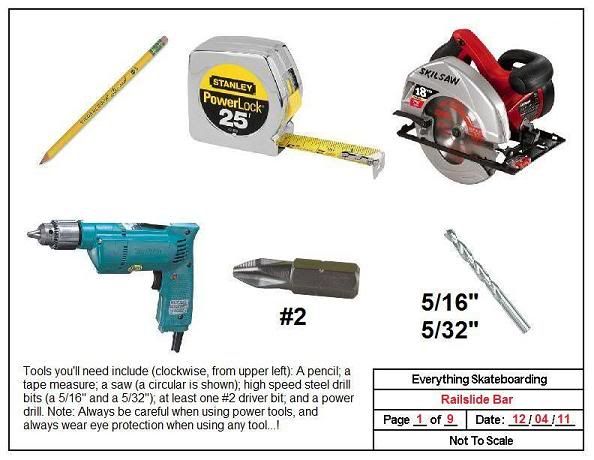
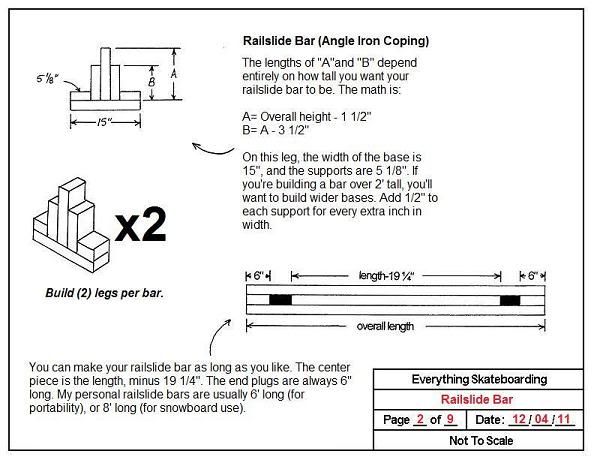
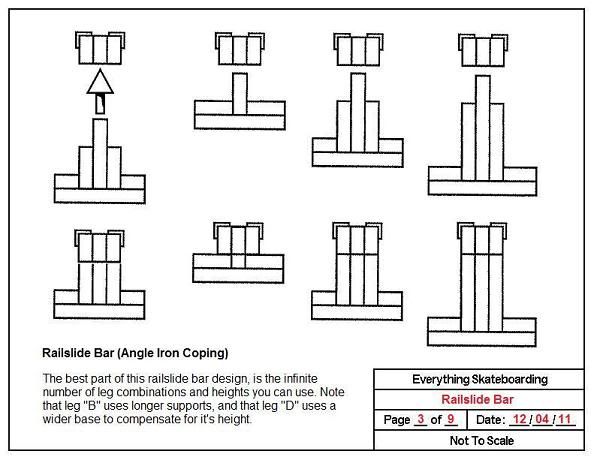
The smaller pieces of wood that make up the feet of the legs can sometimes split when you're screwing them into place. If that happens to you (and it might, depending on how dry the wood is, and how close to the edges you're trying to put the screws in)... try drilling some 1/8" pilot holes through the 2 x 4's before you screw them into place. That will usually solve the problem.
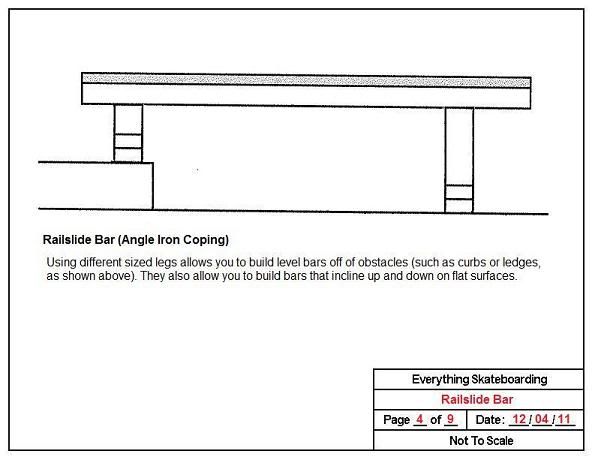
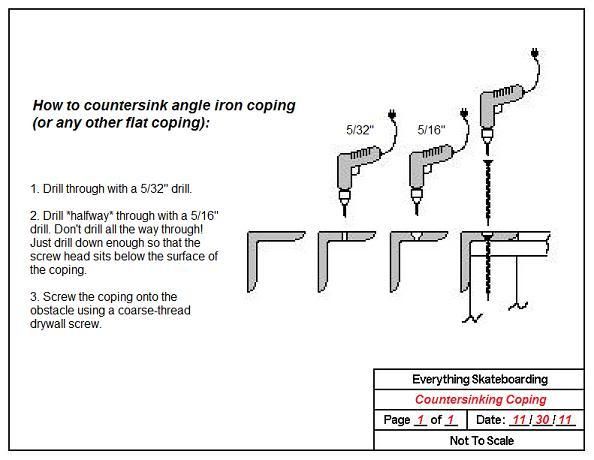
I cannot stress enough the importance of getting 1/4" thick angle iron, and generously countersinking it so that the screw head sits well below the top surface of the railslide bar. On skateboards, screw heads can be huge annoyances, taking big bites out of your deck. But on snowboards...? They can be total base killers and faceplant facilitators.
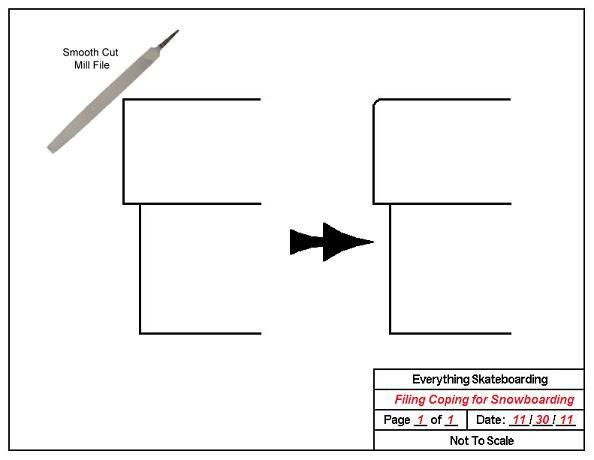
Once again: Sharp edges on steel coping will gouge the shit out of a snowboard base faster than fast. A good file costs five bucks. A new snowboard is more like five hundred.
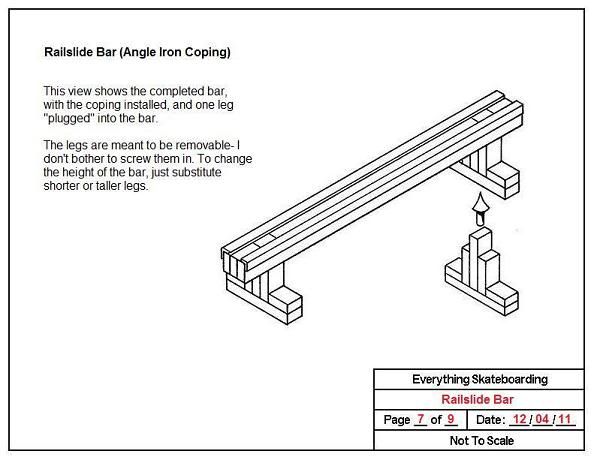
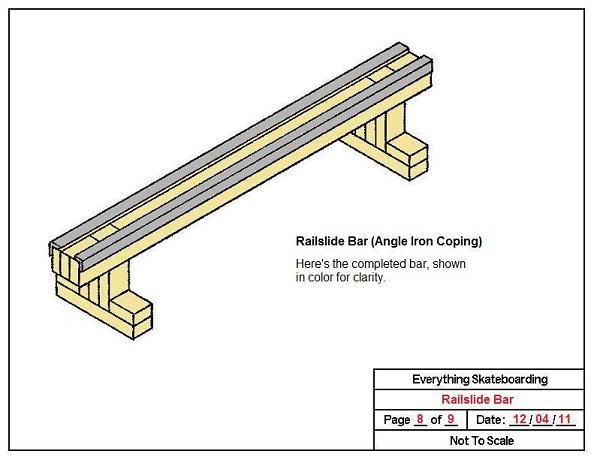
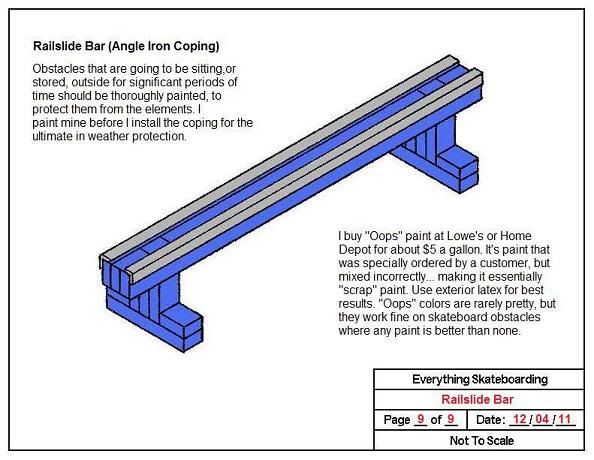
Once it's done, the only thing left to do is wax it and rip it! Hot rolled steel is naturally a little bit sticky when it's new... that's the fun part about it, it actually grinds like a "legitimate street obstacle"... but just the thinnest rub of wax will help it break in quite nicely. Have fun out there! And if you build one of these for yourself, send me a pic. I always like to see what the readers are building these days.
